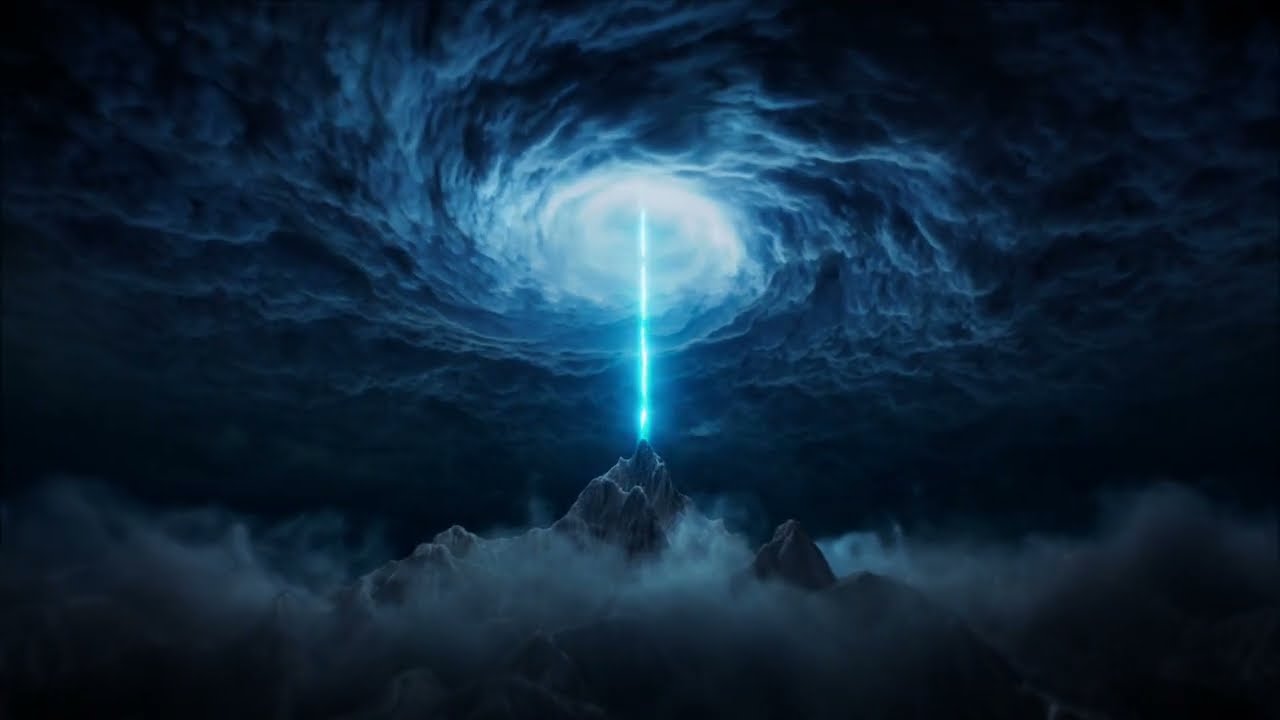
![图片[1]-闪电击中大地气浪烟雾爆炸VFX效果课程 Lightning Strike Destruction – Houdini & Nuke VFX Course-后期素材库](https://hcdn.hqsck.com/wp-content/uploads/2023/11/704b27084020231115181543.jpg)
Creating the terrain
We will be creating this entire scene in Houdini from scratch, including all the effects, geometry, and compositing.
We will start by first creating a terrain, using the heightfield workflow.
We are going to use multiple cutting techniques to obtain fractured pieces only where we need them.
For the simulation we will create a custom vector that will drive the movement of our pieces.
And then we will create some small rock debris which we add on top of our simulation to add more variation and realism.
我们将从头开始在 Houdini 中创建整个场景,包括所有效果、几何图形和合成。
我们将首先使用高度场工作流程创建地形。
我们将使用多种切割技术仅在需要的地方获得断裂的碎片。
为了进行模拟,我们将创建一个自定义矢量来驱动棋子的运动。
然后我们将创建一些小岩石碎片,将其添加到模拟之上,以增加更多的变化和真实感。
Lightning FX and Rays
For the lightning we will create the geometry in various ways. We will use a combination of POP simulations,
copy to points techniques, and attribute vops to have complete control over the lightning.
From our fractured pieces we will create some volumetric rays to add on top of the lightning.
对于闪电,我们将以各种方式创建几何体。 我们将结合使用 POP 模拟,
复制到点技术和属性vops以完全控制闪电。
我们将从破碎的碎片中创建一些体积射线以添加到闪电之上。
Debris Smoke and Dirt
And finally we will use our fractured geometry to create the smoke debris and another layer of particles which
will essentially act as dirt.
最后,我们将使用断裂的几何体来创建烟雾碎片和另一层粒子,
基本上会充当污垢。
Render and composite
In the rendering section I will go over how we can setup different renders for each layer that also contains AOV’s,
to have complete control over each of our elements.
In the Nuke section we will bring everything together to complete the final look. This part will be fairly
straightforward, with the occasional tips and tricks, and some of my favorites nodes that I use on daily basis.
在渲染部分,我将介绍如何为也包含 AOV 的每个层设置不同的渲染,
完全控制我们的每个元素。
在 Nuke 部分,我们将把所有东西放在一起来完成最终的外观。 这部分将相当
简单明了,偶尔会有提示和技巧,以及我每天使用的一些我最喜欢的节点。
![Houdini几何基础视频教程合集 Hipflask – Houdini The Geometry Essentials Collection [1-6]-后期素材库](https://hcdn.hqsck.com/wp-content/uploads/2022/09/d6eee88d70163910.png~tplv-nw7cu3zhcg-hqsck-img-v4:0:0.image)
暂无评论内容